With GEAR, it's easy for CD or DVD publishers to speed up their turnaround time on CD and DVD replication. All you need is GEAR PRO Mastering Edition, and a broadband Internet connection. Many top disc replicators use GEAR, offering their customers a faster and better way to get their discs replicated.
GEAR has made Internet Transfer of CD and DVD titles simple, secure, and reliable. GEAR converts your project or disc to an industry standard DDP image. This set of files is in the format that disc manufacturers require. The DDP image contains all the contents of your master disc, plus formatting information that insures your replicas will match your master exactly. The "electronic" version of your master is easily processed by disc replicators.
GEAR PRO Mastering Edition includes the advanced capabilities that professionals need.
Using suitable hardware and media properly supported by the hardware...
- GEAR detects uncorrectable errors (E-32s, or C2 errors) that may occur when reading a CD Audio track.
- GEAR scans all CD subcode, copying all track timings and index points exactly.
- GEAR scans CD-ROM titles to detect and optionally correct postgap errors.
- GEAR can copy subcode contained in the R through W channels, allowing for accurate copies of CD+G, CD+MIDI, or CD-text titles.
- GEAR can include a set of checksums for each file in the DDP image.
- Replicators or mastering facilities can use GEAR to verify the checksum file included with your DDP image after it is transferred.
- GEAR can include a log file, documenting the step by step results of the process of copying the CD or DVD to a DDP image.
- GEAR can compress the entire DDP image into a .zip file.
- GEAR can encrypt the .zip file, protecting it with a password that only you and your business associates know.
- GEAR can automatically transfer the DDP image via FTP to the CD or DVD replicator or mastering facility.
NOTE: Before transferring or submitting your DDP image to your replication facility for glass mastering, GEAR strongly recommends burning your own check disc from your DDP image.
GEAR PRO Mastering Edition 7.03rc19 provides this functionality as a ‘GEAR Command’. Instructions are available here.
Beginning with GEAR PRO Mastering Edition 8 (pending release) there will be a new GUI menu option for burning DDP images to CD-R/DVD±R(W) media. Dual-layer DDP images will also be supported. More information on GEAR PRO Mastering Edition 8 is available here.
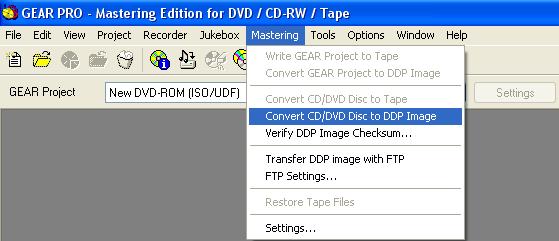
- To transfer a CD or DVD to a mastering facility or replicator, simply run the "Convert CD / DVD Disc to DDP Image" command from the "Mastering" menu.
- A window will appear, where you can set up specific instructions for this order.
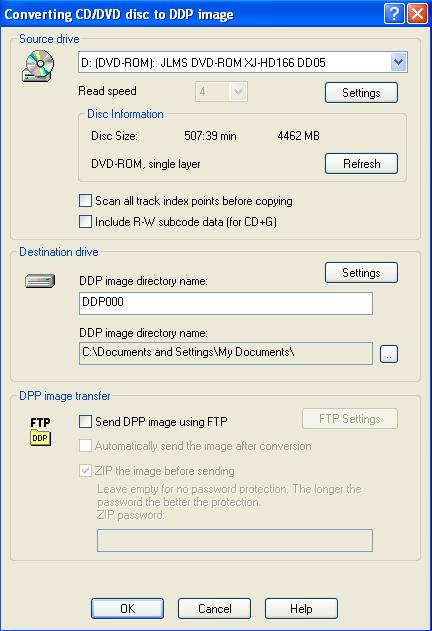
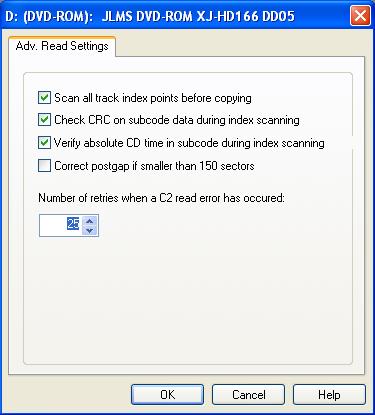
- GEAR allows you to transfer the disc to a DDP image on your computer, or on a network drive, or optionally transfer the image via FTP. Selecting the Source Drive "Settings" button in the window above, brings up the dialog box shown below.
- Selecting the Destination Drive "Settings" button in the window above, brings up the dialog box shown below.
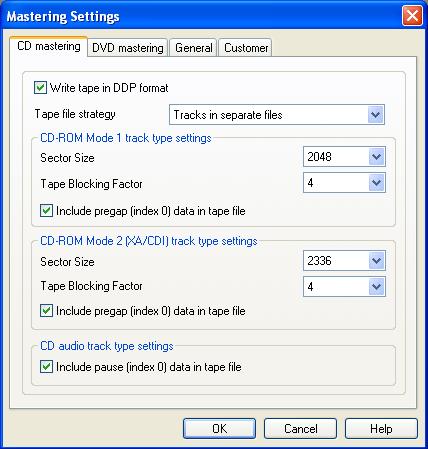
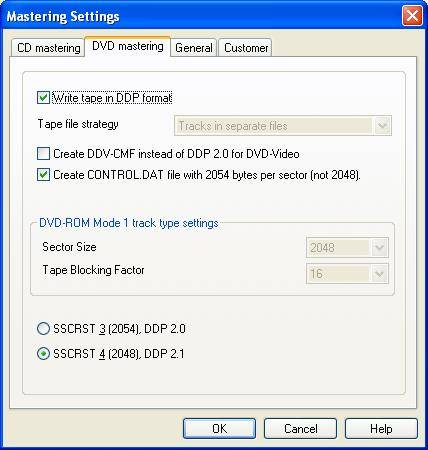
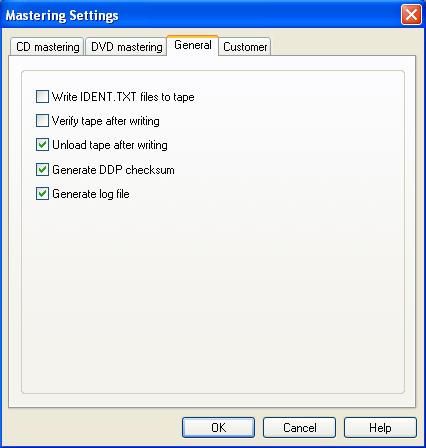
- You can choose to add a checksum file to your DDP Image (recommended for Internet Transfer), and to add a log file. Your mastering service or replicator will be able to advise you on the procedure that they prefer.
If you want to transfer the DDP Image over the Internet, you can save your FTP settings by pressing the "FTP Settings" button in the first window above. A dialog box will appear as shown below.

When you have chosen all your settings, press OK to close each window, and the process will start. While there is a bit of setup to do on the first disc that you transfer, later orders will use the same settings, except for the name of the image directory.
|