How To RIP CDs, CD Audio tracks to WAV, MP3, WMA, OGG, or MPEG Audio files
GEAR lets you extract tracks from a CD and store them on your hard disk for recording on a CD-R.
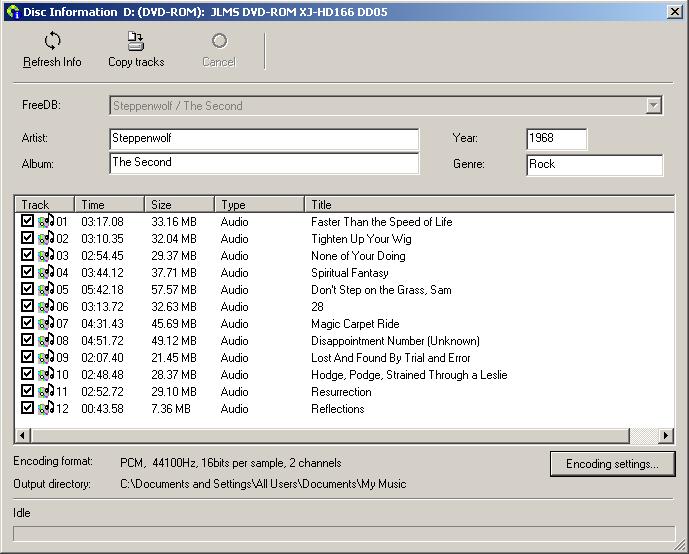
- 1. Insert a CD in your CD recorder. Be sure the "Output Device" selected in the device panel is the drive containing this CD. If desired, right click on your chosen drive and adjust the drive settings to control the drive's read speed.
- 2. On the main toolbar, click the "Extract tracks from hard disk" button
 to display the window that lets you RIP CD-Audio tracks. to display the window that lets you RIP CD-Audio tracks.
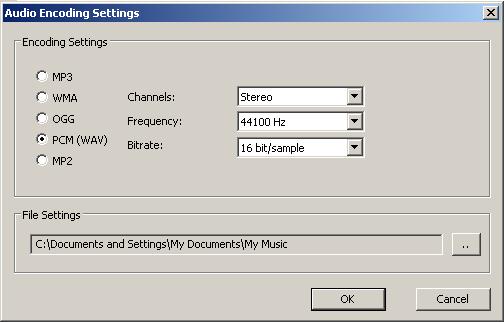
- 3. If your PC is connected to the Internet, and if the CD is in the FreeDB database, it should be automatically recognized, and the artist, album name, and track titles should be displayed. You can check the box next to each track that you want to rip. If you want to change the format that the tracks will be written in, click the "Encoding settings" button. When you are ready to rip, press the "Copy Tracks" button, and GEAR will transfer and encode your audio tracks to your PC.

The Audio Encoding settings window lets you change the file format, the bit depth (quantization level), or the sampling frequency. You can also change the default directory to store your files.
- Could it be any easier to rip audio CDs to WAV, MP3, WMA, OGG, PCM, or MPEG Audio?
|