How to restore a CD-ROM or DVD DDP image to disk
A DDP image includes a physical image for the content, as well as several files that describe the version of the DDP specification that the image complies with (DDPID), and the track and subcode layout (PQ_DESCR). CD-ROM and DVD titles will include a 2048 byte/sector physical image for each layer. The physical image files in the DDP image will end in ".DAT" (for example MAIN.DAT, or TRACK1.DAT).
For CD-Audio, you would most likely have a 2352 byte/sector physical image for each track. Restoring CD-Audio images is made more complicated by the separate tracks and subcode. So, CD-Audio images are not covered by this procedure.
The following procedure should work for any DVD title. If you are restoring a CD-ROM title, just substitute CD for DVD in the procedure.
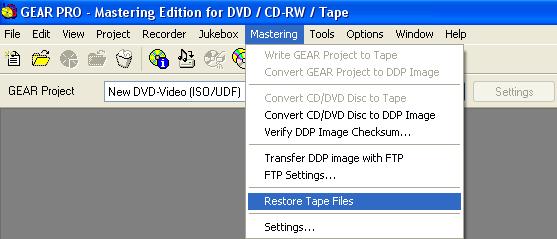
- 1. If your DDP image is on DLT, use GEAR PRO Mastering Edition's "Restore Files from Tape" command to transfer the image to hard disk. For DVD9 titles, do this for each layer. GEAR can only restore files from ANSI formatted DDP tapes (DLT, Exabyte, 4 mm DAT). If your DDP image is already on your hard disk, skip this step.
-
2. If your DVD title is a DVD9, take the 2 physical image files from the DDP image (the big file ending in .dat), one from each layer, and join them with a Windows Copy command into one physical image file (Ex: "copy /b file1.dat+file2.dat file3.dat"). Be sure to use the /b switch (for binary image copy), and be sure that the physical image for layer0 is first! To calculate the layer break point for your DVD9 image, find the exact size of layer 0 in bytes. In Windows Explorer, right-click on the file and choose properties. The size of the file is shown as "size" (ignore the size on disk, which is rounded up). Divide the file size by 2048 to find the number of sectors. The result should be a whole number, with no remainder, and the result should be evenly divisible by 16. After you recover your DVD image, you can use this layer break value to master your title. [Note: If the size in bytes does not divide evenly by 2048, the image may have been formatted for CSS protection. In this case the image would divide evenly by 2054. You will not be able to open this physical image in GEAR.]
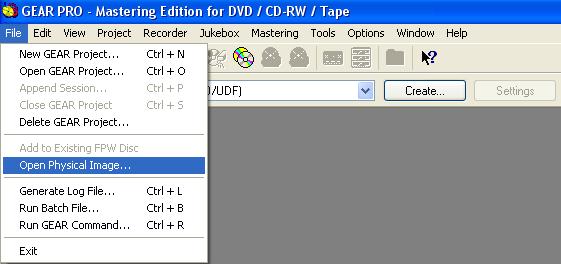
- 3. Open the physical image with GEAR. Since GEAR expects a different file extension, first enter *.*, then you will see all files and be able to select your physical image file (we will improve this in the next release...).
- 4. Burn the physical image to DVD. A DVD-RW or DVD+RW would be ideal for this temporary copy of the disc image. The disc you burn will not play on DVD Video players... because it will be a DVD ROM disc with a copy of the VIDEO_TS folder.
-
5. Copy the
contents of the recorded DVD back to hard disk. Now you can burn
the DVD movie to disc. If your title is a DVD-9, set the layer break to the value you calculated in step 2.
|