|
|
How to Create a Disc from a Physical Image
GEAR PRO Linux provides the ability to write a disc using a physical image.
- 1. To create a disc using a physical image, open a project using the "Open external physical image" option.
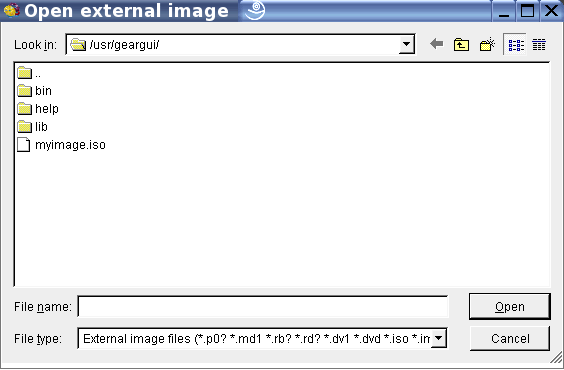
- 2. Click the "Create" button to the right of the pane. The "Open external image" window appears.
- 3. Select the image you would like to use and click the "Open" button on the bottom right of the window.
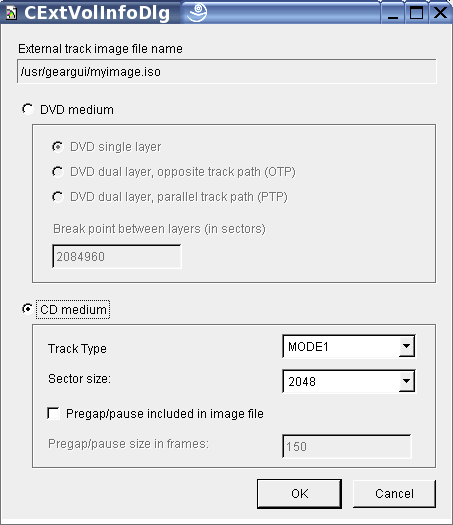
- 4. The "CExtVolInfoDlg" window will open, choose the options appropriate for your project and click the "OK" button. (Options for a CD image are shown).
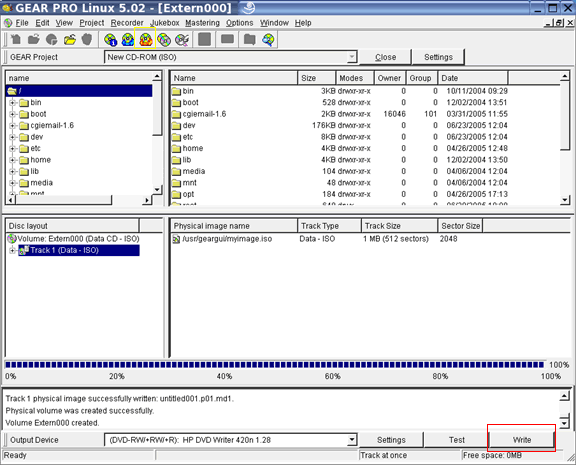
- 5. The project window will appear, showing the image you have selected. To create the disc from the image, click the "Write" button located in the bottom right hand corner (boxed in red) or the "Burn a disc" icon located in the upper left corner (boxed in yellow).
- 6. Finished. The image is now being written to the disc!
*All images shown are from GEAR PRO Linux 5.02, being run on SuSE Pro 9.1*
|


