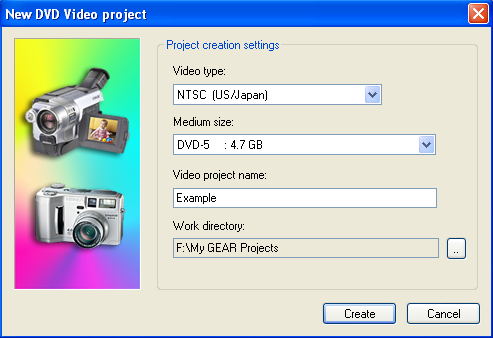
| Authoring DVD-Video Discs In order to create a DVD-Video disc from your captured video files, you must first encode the video to DVD format. When your video files are in MPEG-2 format, you are ready to create a DVD-Video disc. This process is called "authoring". DVD Authoring is the process of choosing the video segments to include on the disc, as well as creating the menus. GEAR will automatically generate all of the necessary files and structures when you are finished authoring the DVD-Video title. How to author a DVD-Video title To author a DVD-Video, choose "Author DVD-Video Title..." from the "Author" menu.  The New Video project dialog box appears...
The DVD authoring window appears.. 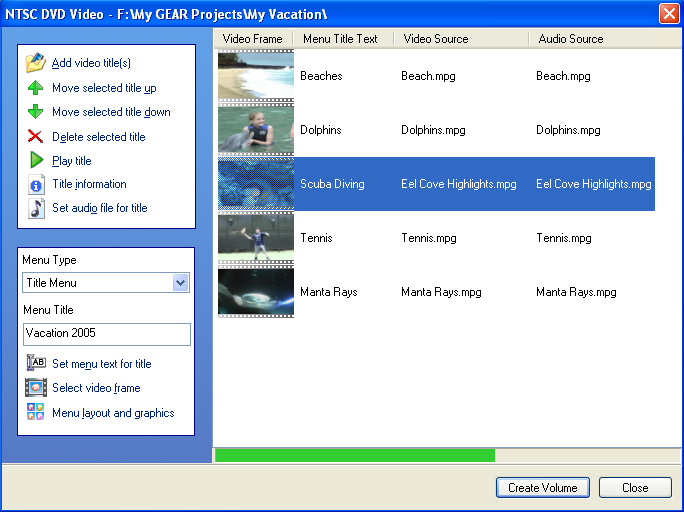
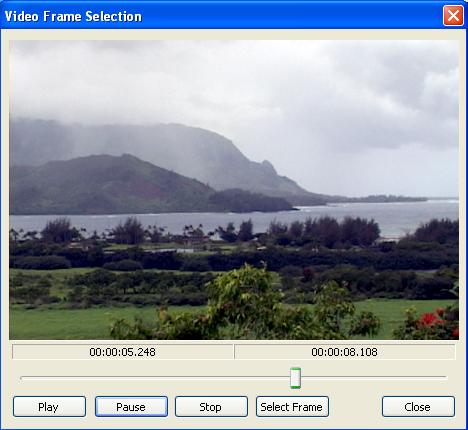
You can "add video titles" to the title. This button will let you select video files that are encoded to DVD-Video specifications (MPEG-2). If you encoded the audio with the video, they will both be part of the same MPG file. If you used a separate program to encode the video, the audio may be in a separate file. In this case, press "Set audio file for title" and select the corresponding audio file. You can double-click the menu title text, and edit the label (in this example, the first label is "Beaches"). You can move titles up or down, to change the order of playback, or you can delete a title from the disc. The "Menu Type" allows you to select "No Menu" (in which case the video just plays, with each title played in the order that they are arranged), or "Title Menu", which automatically creates a menu that allows you to access each title individually. Under "Menu Title", you can enter the title that will be at the top of the main menu. To adjust the video frame that will be used for the menu thumbnail, select the video title (click on it), and select "Select Video Frame" (or just double-click on the title). The video frame selection window appears...
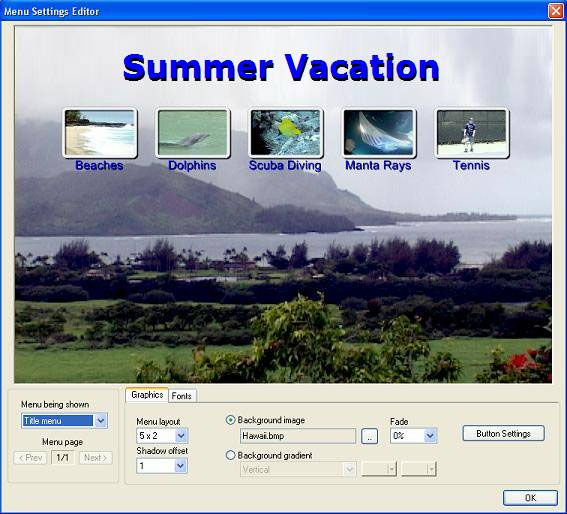
To set your menu options, select "Menu Layout and Graphics" from the video authoring window. The menu editing window appears...
Each title will automatically be arranged with a thumbnail video still picture. You can select the grid to place each title thumbnail on. Font sizes, type, and color can be adjusted from the font menu tab. Select a shadow offset to add three dimensional depth to the text on the screen. A background image can be selected, and faded if necessary. To select a frame of video as your background image, press the ".." button next to the background image filename. A window will appear asking you to select a file. Set the "files of type" to video, and select the video file that you want. The video frame selection window will appear, allowing you to play the video to choose the point that contains the best frame of video for your menu background (this function is described on the preceding page). Press "select frame" when you get to the video frame that you would like to use for your menu background. When the DVD menus are ready, press OK. When your DVD is authored, press "Create Volume" to create your title. This will return you to the main GEAR project interface. Your new DVD-Video title will be loaded into a new DVD-Video project (volume) in GEAR, ready to write to disc. You can add any additional files to the disc (in the remaining space available), and burn it when you are ready. GEAR Video makes DVD Authoring fast and easy. |