How To Create Audio CDs
With GEAR it's easy to create your own audio CDs. GEAR lets you write audio CDs that are fully compatible with the CD Audio specification, so they will play in almost any CD player. Create your own greatest hits CDs. Make some party discs, or create your own discs for any mood or theme (dinner music, romantic songs, relaxing music, children's music. whatever you want!).
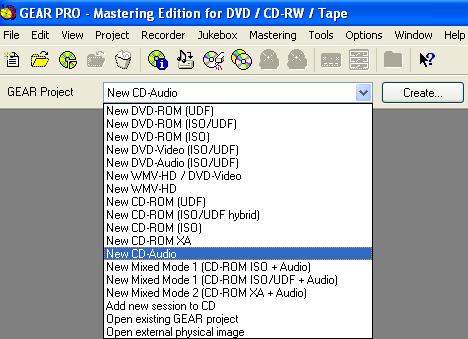
- 1. Select CD-Audio as Type in the Project panel. Click Create to create a new project.
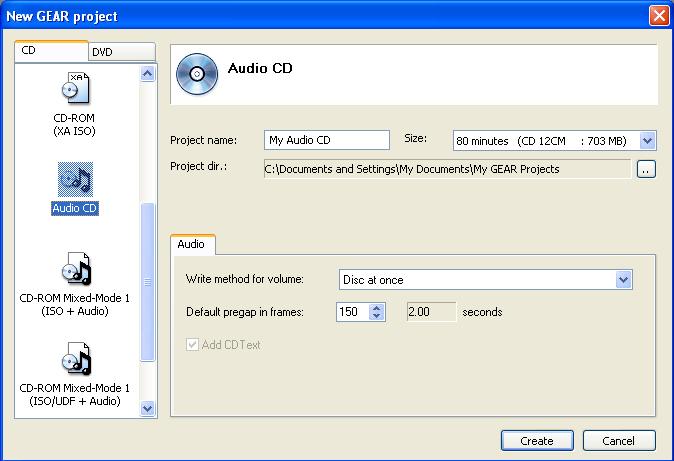
- 2. You will be prompted to enter a project name and size. Enter a name for the new project. Choose the appropriate project size. If you want to use overburning on a 74 minutes disc select a project size of 76 minutes instead of 74 minutes, and enable the overburning feature in the device settings for your burner. For overburning on 80 minutes media select a project size 82 minutes. Select the directory and drive where you want to save the new GEAR project. Click Create to close the window and create the new empty audio CD project.
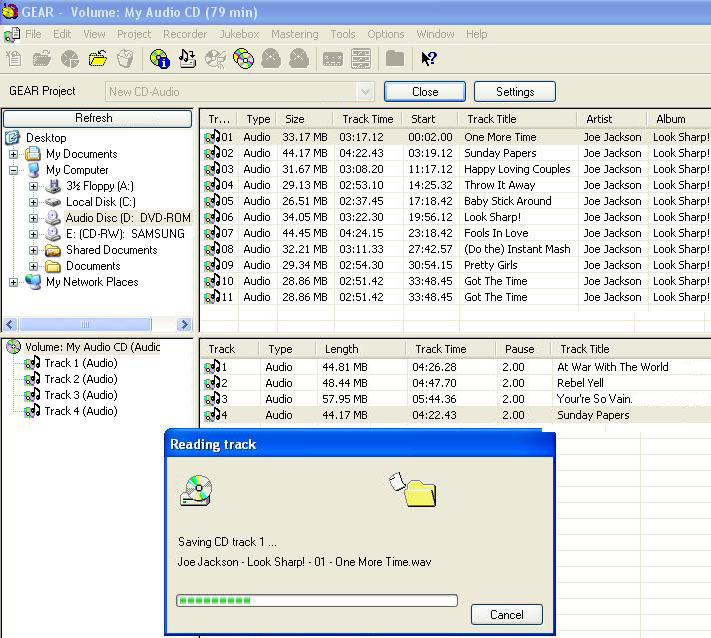
- 3. From the Explorer window (upper window), locate and select the WAV, MP3, OGG, WMA, or MPA audio files you want to load, then drag them to the Volume window (lower right window). You will see that a new Audio track is created automatically for each file you drag into the GEAR project. MP3, OGG, WMA or WMA files will first be converted to temporary WAV files before being loaded.
You can also copy tracks from an existing audio CD directly in your project. To do this, insert the audio CD in a drive. Click on the drive in the explorer window (top left). The top right window will display all the tracks on the CD. Then drag and drop the tracks you want to copy from the CD information window to the GEAR project window (lower-right window). GEAR will then perform digital audio extraction on the drive and create (extract) a wave file for every audio track. The wave file will then be used for creation of a new audio track in your GEAR project.
- 4. Continue to select and load tracks or files for the project until your Audio CD project is finished. If necessary, you may want to change the order of the tracks (by moving tracks in the lower-right window). Or you may want to edit the pauses between the audio tracks or assign ISRC codes to the tracks. You can do that in the GEAR project window directly (lower-right window), or using the right click menu of an individual track.
- 5. Select the burner you want to use in the device window. Press the "Write Disc" icon
 in the GEAR toolbar. in the GEAR toolbar.
Could it be any easier to create audio CDs?
|